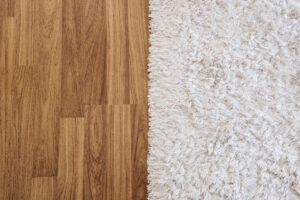
Combined, Brits spend billions of pounds on carpets and other floorings every year – that’s a lot of floors! If you’re looking to refresh yours, fitting the underlay yourself will shave a little off the overall cost to replace the underlay and, of course, your flooring. So what’s the best method how to lay underlay for carpets? Here, we’re sharing our favourite.
But first, let’s take a quick look at which flooring types require it.
Which floorings require carpet underlay?
This is a bit of a trick question (sorry!) as all types of flooring require a good underlay to ensure they are well insulated, reduce noise and provide a cushioned feeling underfoot.
Choosing the right type for your flooring is especially important as each type of flooring from engineered wood to carpet has its own requirements. You may also want to shop around to find the ideal underlay to accommodate special features such as underfloor heating.
Before you decide to fit the underlay yourself
Prior to doing anything at all, it is always essential to ensure you are fit and able enough to get the job done without strain. If back injuries or joint pains are a concern, don’t be afraid to ask for help or let the professionals do it for you. Fitting flooring underlay will involve a lot of bending over and squatting down.

Required materials for laying underlay
Before we dive into how to lay a carpet or laminate with underlay, you need to get your hands on a few things. To get fitting your underlay you will need the following tools and materials:
- Work overalls, kneepads (optional) and gloves
- Measuring tape and pencil
- Utility knife, hammer, staple gun and general-purpose snips
- Grippers or gripper rods (for carpets)
- A suitable adhesive
- Underlay tape
- Durable underlay to suit your chosen flooring
How to lay underlay in 7 simple steps
You’re fit and healthy, your materials are gathered and you’re all psyched up to get the job done, what’s next? It’s time to learn how to lay underlay and transform your floor into a gorgeous canvas for your interior.
1. Measure up
A project is only as good as its planning. That means getting your measurements absolutely right, after all you don’t want a huge surplus of material or even worse a lack of underlay. If you’re the visual type, drawing a quick diagram may prove helpful.
You can ignore any protrusions in the room as you will cut the additional underlay around these. Simply measure the room at its widest and longest points.
Pro tip: If you’re fitting a carpet add a minimum of 10cm to the width of the widest points as this excess will come in handy for trimming and fitting later down the line.
2. Set a budget
Once you know how much space you’re working with, you can estimate how much carpet underlay you will need and, by extension, how much it will cost. Keep this budget at hand when you shop around for the underlay.
3. Choose your underlay
Now for the interesting part – picking out your flooring underlay. As with any DIY project, selecting the right materials for the job is key.
There is a myriad of carpet underlay types to choose from, but most carpet fitters and retailers will offer PU foam, crumb, sponge rubber and combination felt and rubber underlay, which all work to improve heat retention and absorb the pressure of footfall.
The deciding factor
Your main consideration, however, should hinge on what type of subfloor you’re working on. Ground floor subfloors such as concrete are hard, cold and prone to moisture damage rising through the material. Here, you should go for an underlay with a built-in moisture barrier to protect your flooring.
If you will be laying your underlay on a wooden subfloor, there is less to worry about as they are often on higher floors and less subject to moisture damage. This means a vapour barrier isn’t always necessary. Just make sure to select a thickness that is suitable for laying carpets over.

4. Prep your floor
The next step is preparing your floor for the installation. This involves making sure the surface is dry, clean, flat and tidy so that the flooring will be level and safe when laid.
Sweep away any debris from the previous flooring and use a vacuum cleaner to suck up any dust. If working with a concrete subfloor that has seen better days, you may want the surface to be prepared professionally, given its absorbency.
5. Place your grippers or lining paper
Next up, you will need to instal one or both of these things. Gripper rods to keep the carpet in place and lining paper as a layer of extra protection.
Installing the grippers
Place your gripper rods into position, being careful not to scratch yourself on their sharp edges. You should arrange them approximately 10mm away from the skirting board, with the points facing upwards and the angled side closest to the wall and then hammer into place. This will allow just enough space for the flooring to be tucked in around the edge for a wonderfully neat finish.
If you are working with a concrete subfloor and can’t nail them down, use a high-quality gripper adhesive to glue them into place. And one last thing: don’t forget to leave a gap at the doorway! This will be where you will fit a carpet-to-carpet threshold strip or metal edging bar, depending on the adjacent type of flooring.
Laying down interliner
We highly recommend using an interliner for concrete subfloors. As concrete is such a porous and absorbent material, you’ll want to prevent any water coming into contact with it, penetrating the subfloor and causing mould growth or degeneration to your new carpet. You can do this with the combination of an underlay with an in-built vapour barrier and a layer of paper interliner.
Make sure to use lining paper before you set down your underlay as this will stop the underlay from sticking, all whilst protecting it from damage via dust and dirt. Plus, it adds a little extra heat insulation, which can never be a bad thing.
All you have to do is roll it out and you can fix it in place with a hammer tacker or heavy staple gun. Simply fit it around the edges of the room and fix it down using your tape, taking extra care to ensure the rows overlap and the joins are neatly taped over.
Not to be overlooked
When it comes to carpet prep, it’s always better to be safe than sorry. This means ensuring the interliner and grippers are installed correctly.
Be warned that if you decide to fit the underlay and gripper rods yourself and leave the carpet installation to a professional, they may refuse to fit the new carpet if the preparation work isn’t up to standard.
6. Lay down your underlay
Lay down your rolls of underlay side by side, right up to each of the walls and leaving a 10mm gap for any radiator pipes.
As you’re learning how to lay a carpet with underlay, you’ll find that it’s particularly important to get the placement of your underlay right. Ensure that when you roll out the underlay, they overlap the gripper rods but don’t overlap each other.
When you’re happy with the placement of the carpet underlay, use your utility knife and cut to the size of the room. Aim for no less than full coverage with foam and rubber underlay placed face down with the backing upwards and coloured film touching the subfloor.
On concrete subfloors
An important step when it comes to laying a carpet with underlay is ensuring you put down an interliner for extra protection from draughts and staining.
Often the lining paper will do, but you may want to go for something stronger such as a damp-proof membrane if you’re especially concerned. Additionally, it’s crucial that when you put down the underlay you do it with vapour barrier side down to the floor.
On wooden subfloors
For wooden subfloor, much is the same, minus the higher risk of moisture damage. The key thing, however, is to ensure that you lay your chosen underlay the rubber side down.

7. Finishing touches
Once in place, you can use your underlayment tape to seal the joins between the underlay strips in order to keep them nicely sealed and to prevent them from showing underneath the carpet.
As with any lining paper, ensure the joins are fully covered. With this confirmed, you can then fasten the underlay in place by stapling it at 30-40cm centres or, if you’ve opted not to use lining paper, using an underlay adhesive to stick it down to your wooden subfloor.
To finish up, staple the underlay along the floor edges and inside the gripper, being careful you don’t leave any gaps between the lengths of underlay or let them overlap. This will allow it to lay flat and smooth under your chosen carpet.
Now all that’s left is to trim the edges appearing just inside the carpet gripper, and, of course, to grab yourself a drink for all your hard work.
And that’s a wrap
Et voila! The complete rundown on how to lay underlay for carpets. By following these simple steps when you fit your flooring it will beautifully cushion your feet as you cross the room, allowing you to rest assured its life spark will keep burning for years to come.
Still unsure how to lay underlay?
If you’re still uncertain whether a DIY job is for you, it’s perhaps best leaving it to the experts. With qualified and dedicated flooring professionals, you can rest easy knowing your underlay will be fitted swiftly and with a beautiful finish. So don’t wait any longer, get in touch with our friendly team.