Luxury Vinyl Tile (LVT) is a go-to choice for homeowners and renovators alike, offering the rich look of hardwood or stone with greater durability and a friendlier price tag. But, if you’re one of the 70% who tackle home improvement projects themselves, there’s one step that can make or break the final product: making cuts. In this guide to cutting LVT flooring, we’ll walk you through exactly what to do so that you can get the job done right.
This guide is designed to be comprehensive, so feel free to use the contents below to skip to the parts you need most:
- What Is LVT Flooring?
- When You Might Need to Cut Your LVT
- A Safety Note
- How To Cut LVT Flooring Step by Step
- Bonus Tips and Tricks
- Conclusion
What Is LVT Flooring?
The ability to accurately and efficiently manipulate any type of flooring begins with understanding what exactly it is you’re working with. LVT stands for Luxury Vinyl Tile, a flooring option that is built to handle wear and tear whilst still looking stylish. A typical plank is made up of several layers of high-performance materials, including:
- A tough protective layer to prevent scratches, dents, and other damage.
- A printed design layer to give the flooring its appearance.
- A core layer to provide stability and structure.
- An optional underlayer to add cushioning and sound insulation.
Because of this multi-layered construction, cutting LVT properly requires a sharp blade and solid technique. You’re not just tackling soft vinyl; you’re attempting to slice through reinforced materials.
What’s The Difference to Sheet Vinyl?
Whilst LVT and sheet vinyl both fall under the vinyl flooring category, they’re built – and cut – differently. Where LVT comes in individual, durable planks, sheet vinyl, installed as one continuous roll, tends to be much softer and more flexible, making it somewhat easier to cut.
If you’ve just now realised that you’re not working with LVT after all, we have a dedicated guide to cutting sheet vinyl too.
When You Might Need to Cut Your LVT
No matter how simple your floor plan, cutting LVT is almost always part of the job. Here are the most common reasons you might come across:
- Around obstacles – Jutting walls, skirting boards, pipes, door frames, and built-in units all require careful shaping for precision.
- At walls and corners – Unless you’re lucky enough to have an exact match between your room dimensions and plank size, you’ll need to trim the final planks of each row to get a snug fit.
- For finishing touches – Sometimes a plank needs cutting down slightly to ensure as sleek a finish as possible.
- When laying your planks in a staggered layout – ensure that the joints between rows are offset by at least 6 inches, not only for a more natural appearance, but also to maintain the floor’s strength and stability. To achieve this, you’ll typically need to trim the first plank in each new row.
So cutting is bound to be part of the process, meaning that knowing exactly how to cut LVT flooring is essential to both the look and longevity of your project.
The Most Important Step: Safety
Before you even think about making the first cut, safety comes first. We know it’s a bit of a bore, but with DIY-related injuries on the rise, it’s a reminder worth repeating. Ensure you keep the following in mind:
- Always follow any manufacturer guidelines first and foremost.
- Wear eye protection, especially when using power tools, to protect yourself from debris and dust.
- Use sharp blades not only for a better cut, but also because dull blades are more likely to slip, increasing the risk of injury.
- Work on a solid and stable surface to make sure your materials don’t shift or move during the cutting process.

How To Cut LVT Flooring
Cutting LVT flooring doesn’t have to be a complicated process, but taking a moment to ensure that you have the right tools and understand the method fully makes all the difference. So, let’s get cracking.
Equipment List
- LVT planks
- Cutting device(s) of choice (utility knife, vinyl floor cutter, jigsaw)
- Pencil or marker
- Ruler or another straight edge
- Measuring tape
- Contour gauge (for curves)
- Drill (for holes)
- Angle ruler (for angles)
- Safety gear
- Protective material or spare board for worktop
Which Cutting Method?
The cutting tool you pick can be an important determiner for how clean the cut turns out, how fast you’re able to work, and how much material you might waste.
A utility knife is a solid, reliable choice for most straight and simple cuts, especially if you’re newer to installing LVT or flooring in general. Just ensure that the blade is sharp enough. Also, note that if you’re creating a short cut (when there isn’t much leverage to perform the snap), it’ll be much easier to use a different method.
A vinyl floor cutter is ideal if speed and precision are your priorities. It gives crisp results with minimal effort.
For more complex cuts, especially around obstacles, a jigsaw tends to offer more control and flexibility, which are both essential for getting those nooks and crannies right.
Which Core Does Your LVT Have?
The core type of your LVT product also affects how it behaves during cutting. WPC (wood plastic composite) is generally much easier to cut as it is lighter and softer, making it simple to score and snap with a utility knife.
However, SPC (stone plastic composite) is much tougher and more rigid, meaning that it doesn’t score easily and may crack when making detailed cuts. If you’re working with this type of core, a vinyl cutter or jigsaw will handle the job a lot better.

Measuring and Marking
Cutting to Width
- Measure the space where the plank will fit, making sure to allow for any expansion gaps.
- Using this measurement, mark the cut clearly with a pencil or marker and a straight edge. Make sure your measurements are accurate on both ends of the plank to avoid skewed cuts.
Cutting to Length
- Measure from the wall to the next row of planks, taking care to account for an expansion gap.
- Using this measurement, mark the cutting line using a ruler and marker. Make sure the line is accurate and straight.
Awkward Cuts
Be sure to account for expansion gaps in your measurements for the following:
- For notches – use a ruler to measure the perimeter of the notch and outline the area and on the plank.
- For angled cuts – use an angle ruler to measure the required angle, using this measurement to draw the cut line.
- For curved cuts – trace the curve with a contour gauge and then mark it onto the plank. You might need to extend the lines a little by eye.
- For holes – measure the diameter or size of the pipe, vent, or fixture you’re working around. For round holes, use the measured diameter to draw a circle onto the plank. For square or rectangular cut-outs, use a ruler to mark the shape precisely.
Cutting to Width
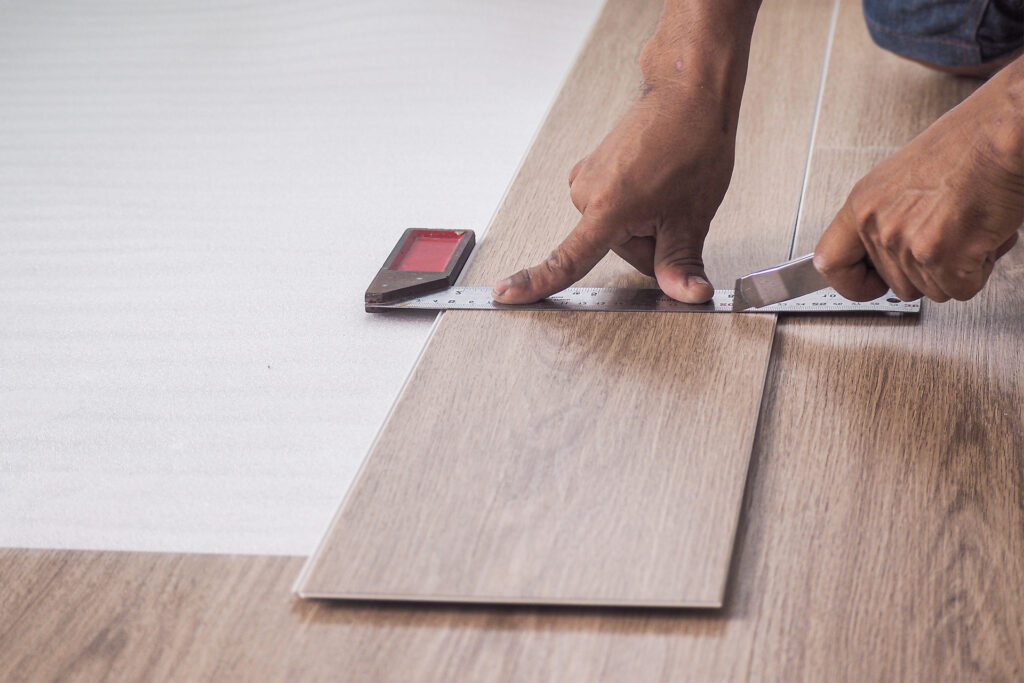
Cutting LVT to your room width is the job you’ll likely do most often – usually when you reach the end of each row and the remaining space is narrower than a full plank. Once you’ve measured and marked your cut line, here’s how to approach it using your chosen tool:
Utility Knife
- Place the plank on a flat surface and align your straight edge with the cut line.
- Score the surface firmly, dragging the blade along the straight edge with even pressure.
- Repeat the scoring if needed – just don’t overdo it, or you risk getting a ragged edge.
- Position the plank over a solid edge and apply quick, downward pressure to snap it cleanly along the cut line.
- If the backing layer doesn’t separate fully, drag your blade along the layer to finish the cut.
Vinyl Floor Cutter
- Place the plank into the cutter and line up the blade accurately with your marked line.
- Pull the lever down in one smooth motion.
- The cut will usually separate most of the way, but the backing layer may stay connected. Just slice through it with your utility knife.
Jigsaw
- Flip the plank design side down to reduce damage to the pattern.
- Clamp the plank firmly to your workbench, using a spare or scrap board to protect the surface beneath.
- Line the blade up carefully with your marked cut.
- Begin cutting slowly and steadily, letting the blade do the work. Don’t rush it.
Cutting to Length
Cutting to your room length is typically needed when you’re working along a wall, either for the first row (to start the project) or the last row (to fit snugly against the wall). Precision is key here, since you’re working with a longer area, and so mistakes are much more noticeable. Take your time to measure and mark, and then go in with your chosen tool:
Utility Knife
For longer rip cuts where you’re tackling the plank length-ways, a utility knife can be tricky as you’re unlikely to get enough leverage to easily snap the material. For this reason, it’s generally not a recommended method, but if you’re wanting to try it:
- Score the line a couple of times with firm and consistent pressure to ensure you’ve cut through the wear layer.
- Try snapping along the cut line. If it feels too tough, use a vinyl cutter or jigsaw instead.
Vinyl Floor Cutter
- Place the plank into the cutter and align it carefully with the blade on your marked line.
- Apply firm and steady pressure with the lever to cut through the plank.
- Slice the backing layer with your utility knife if it remains intact.
Jigsaw
- Place scrap material or another protective layer under the plank to prevent any damage to the surface beneath.
- Clamp the plank securely, design side down.
- Position the jigsaw blade along the marked line and cut steadily. It will take a bit of time since you’re working along a longer length, but rushing will increase the risk of mistakes.

Making Awkward Cuts
When you’re working around obstacles or need detailed cuts for things like pipes or appliances, you’ll have to get a little creative. These cuts tend to occur most often in bathroom flooring and kitchen flooring, but you might find them elsewhere too, so listen up:
Notches – Utility Knife or Jigsaw
- Cut the plank to size first and then mark up the area to be removed (the notch).
- For straight-line notches (like square corners or walls), use the utility knife method. Score the marked area a couple of times to create a deep line and then snap the plank along the score line.
- For more precise cuts, especially if the notch is complex, use a jigsaw for smooth lines. Ensuring that a protective layer is in place and the plank is clamped décor-side down, use the blade to follow your marked lines.
Angles – Vinyl Cutter or Jigsaw
- Using a vinyl cutter, align the blade with your angled cut, just like a standard straight cut.
- Follow the usual process, ensuring the cutter is positioned carefully along the marked line.
- For steeper angles where the plank won’t fit in the cutter, use a jigsaw for better precision. Just be sure to protect your work surface and clamp the plank design-side down first.
Curves – Jigsaw
- Ensure the work surface is protected, and the plank is securely clamped design-side down.
- Position a fine-toothed jigsaw blade along the marked curve and cut slowly along the line.
- Trim as needed to refine the curve and ensure it fits perfectly.
Holes – Jigsaw
- Clamp the plank in place, design-side down, to avoid shifting, and make sure the worktop is protected.
- For interior cut-outs, drill a starting hole large enough for your fine-toothed jigsaw blade to fit through, and then make a small relief cut up to your marked line.
- Cut slowly and steadily along the line, guiding the blade smoothly.
Bonus Tips and Tricks for Cutting LVT Flooring
Before we wrap up this expert guide to LVT cutting, here’s just a couple more tips to help you get the best results:
- Keep your blades sharp.
- Double check all measurements.
- Undercutting is always better than overcutting.
- Practice on a spare or waste board first.
- Always position your blade on the waste side of the cut line to avoid accidentally cutting into the area you want to keep.
Does Your LVT Make the Cut?
Achieving accurate cuts in your LVT floor installation is a crucial step to ensuring that your project looks great – and lasts too. That said, sometimes it’s better to leave it to the professionals, especially if you’re dealing with a particularly complex area.
If that sounds like you, we’re here to help. Get in touch with our friendly team for advice on your flooring needs. Alternatively, for more guides and inspiration, check out our other blog posts. We’ll see you over there.