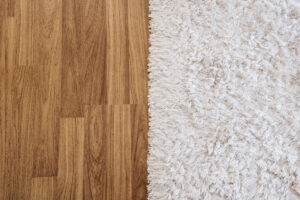
- So, you’ve decided to join the growing number of homeowners choosing laminate for their flooring solution? You’ve made a great choice. Famed for its easy installation, low maintenance requirements, and durability all at an affordable price, laminate flooring is sure to serve you well. But, if you’re looking to make the most of your laminate, you’ll want to invest in some good quality underlay. Enter Derwenthorpe Flooring: we’ve put together this guide on how to install laminate underlay to aid you along the way!
Whilst we usually recommend sticking with the professionals for a high-quality finish, we also appreciate a little DIY every now and then. So, in this step-by-step guide, we’ll take you through:
So, without further ado…
Why You Should Use Laminate Underlay
When installing laminate flooring, underlay is crucial but often overlooked. Ultimately, it provides a range of benefits that work to enhance the durability, comfort, and overall performance of the finished product. Allow us to explain a little further…
-
- Smoother Installation: A well-chosen underlay helps to create a level surface, which can compensate for minor imperfections in the subfloor.
-
- Better Longevity: Underlay can protect your laminate flooring from wear and tear by reducing stress on the click-lock system.
-
- Moisture Protection: If you’re working with a concrete subfloor or a room with a higher humidity level, it is a good idea to choose an underlay with built-in moisture barriers. This helps to prevent unnecessary damage to the laminate.
-
- Noise Reduction: Laminate underlay can absorb impact and sound, reducing footstep noise for a more peaceful living space, especially in busy households.
-
- Improved Comfort: Since laminate flooring is often laid directly over a solid subfloor, it can feel quite hard underfoot. Underlay adds a slight cushioning effect, which can make your floor more comfortable to walk on.
So, whilst it is technically possible to lay laminate flooring without underlay, it’s not recommended if you’re looking for the best results. Just like with carpet, investing in a quality underlay will ensure better performance, a smoother installation process, and long-term durability, making it a worthwhile addition to any laminate flooring project.
Choosing Your Underlay Material
Speaking of investing in a quality underlay, there are several options on the market to choose from. Each has distinct qualities and benefits, meaning that it’s definitely worth pondering over your choices to ensure the best fit for your project. We’ve collated the key information on each option in the table below to make the process just that bit easier.
| Type | Description | Advantages | Considerations |
| Foil | Often considered the premium choice, it features a foam or rubber base with an integrated foil backing. Enhanced thermal properties make it an excellent choice for underfloor heating systems or concrete subfloors. | Excellent thermal insulation. Acts as a damp-proof membrane, protecting against moisture. Compatible with underfloor heating, helping to distribute warmth easily. Installation is often fairly straightforward. | Typically more expensive due to additional benefits. May not be necessary for all floor types (such as wood) where a standard underlay could be more cost-effective. |
| Cork | A more eco-conscious choice, cork underlay is made from compressed cork granules. | Usually made from renewable, biodegradable materials. Has an excellent level of noise absorption, making it ideal for multi-level homes. Naturally resistant to mould, mildew and allergens. | Tends not to be completely moisture resistant, making it unsuitable for damp environments. Has a higher cost due to its sustainability and durability. Doesn’t provide as much subfloor correction as alternatives. |
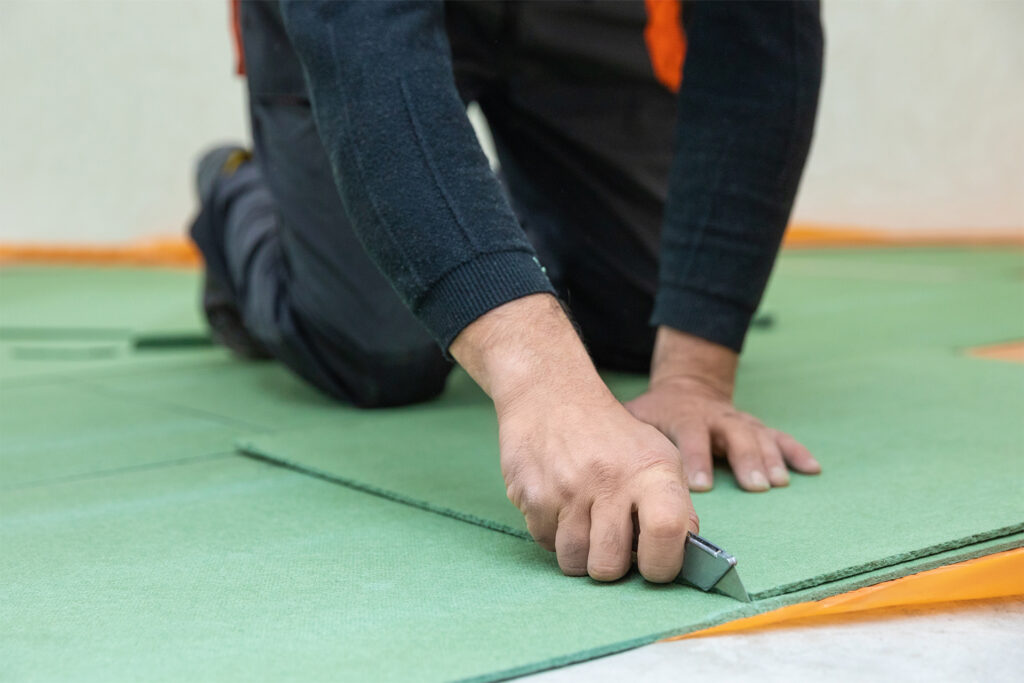
| Fibreboard | Durable and supportive, fibreboard underlay is composed of compressed wood fibres which are often supplied in easy-to-handle panels rather than rolls. | Great for uneven floors as works well to smooth out minor subfloor imperfections. Unlike softer underlays, fibreboard prevents excessive movement in the flooring, which can reduce wear and tear over time. | In its most basic state, it is not moisture-resistant, making it generally unsuitable for damp areas unless used with a separate moisture barrier. Can raise floor height. Requires careful installation to avoid gaps between panels. |
| Rubber | Made from either natural rubber or recycled rubber materials, it is a high-performance underlay often used in commercial or high-traffic spaces. | Highly resistant to wear and compression, ensuring long-term support for laminate flooring. Provides a cushioned feel whilst still maintaining a stable surface. Some recycled rubber underlays offer a more sustainable choice. | Some rubber underlays can emit a rubbery odour when first installed, but this tends to fade over time. Can be heavier than other options, so may also be more difficult to handle and install. |
| Foam | Foam underlay is one of the most popular and affordable choices. It is typically made from lightweight polyethylene or polyurethane foam. | One of the most cost-effective options. Usually comes in rolls which are extremely simple to cut and lay out. Some foam underlays come with a built-in barrier for added moisture resistance. | Has fairly limited subfloor correction. Can compress over time, reducing its effectiveness and longevity – a more robust option may be best for areas with heavy foot traffic. Not as effective as other options when it comes to sound insulation. |
How to Lay Laminate Underlay: Step-by-Step
Choosing the right underlay is essential for comfort, installation, and durability, but proper installation is just as important. So, it’s time for what you’ve all been waiting for: how to install underlayment for laminate flooring. Grab a cuppa and get your pen at the ready as we take you through the step-by-step process to achieve a great finish.
Equipment List
-
- Pen
-
- Paper
-
- Measuring Tape
-
- Cleaning equipment (brush, hoover, mop etc)
-
- Chosen laminate underlay
-
- Utility knife
-
- Scissors
-
- Duct Tape or Underlay Tape
-
- Hammer and Nails (If required)
Step 1: Measure, and Measure Again
Similar to cutting the laminate or sheet vinyl itself, accurate measurements are crucial to ensure that you have the right amount of material without creating too much waste.
Start by measuring the length and width of the room, multiplying these figures together to calculate the total floor area. Add an extra 5-10% to account for any cutting areas or particularly tricky nooks and crannies.
If your room has irregular shapes (such as an alcove or an overall L-shape), split the rooms into smaller sections and then add the areas of said sections together. It can help to visualise this by drawing a diagram on paper – you don’t have to be Picasso or Monet, just make sure you label the measurements right, and you’re good to go!
Always double-check (or even triple-check) your measurements before cutting to avoid any costly mistakes.
Step 2: Acclimatise and Moisture Check
Once you’ve purchased the right amount of underlay, it’s important to allow it to acclimatise to the room conditions before going any further with the process.
Lay the underlay out in the room for at least 24 hours, allowing it to adjust to the humidity and temperature of the space. This step is vital to prevent expansion or contraction after installation, both of which can cause damage or added wear and tear to your laminate flooring.
You should also check the moisture levels of your subfloor. Use a moisture meter or a plastic sheet test to ensure the surface is dry enough for installation. For wooden subfloors, aim for a moisture content of around 6-9%. Concrete subfloors should have a moisture level below 75% relative humidity (RH). Moisture is less of an issue for vinyl or tile subfloors, but you should still ensure there is no visible trapped moisture between the subfloor and the underlay.
Step 3: Prepare the Subfloor
For a smooth and stable finish, you should prepare the subfloor thoroughly. This involves cleaning the subfloor to remove any dirt, dust and debris; checking the subfloor for levelness; repairing any damaged areas such as cracks, holes, or loose boards; and ensuring adequate room ventilation to avoid moisture build-up.
If your subfloor is looking particularly worse for wear, it’s probably worth contacting the experts to complete specialist tasks such as re-levelling. A trustworthy flooring expert will have the tools and expertise to get it right, saving the hassle of a botched job.
Step 4: Lay Out the Underlay
Generally speaking, there are three steps to laying the underlay that apply to each material.
-
- First, you should use your earlier measurements along with a utility knife or scissors to cut the underlay to size, leaving a 5-10% margin to allow for trimming and refinements.
-
- Then, you should position the underlay across the room, before trimming it to a more precise fit, leaving a small gap (around 5-10mm) between the edge of the underlay and the wall to account for expansion.
-
- Finally, it’s time to secure the material. If your choice is self-adhesive, peel off the backing and press firmly down. If not, use a hammer and nails to secure the underlay, ensuring that it is pulled taut. If you’re using multiple sheets or rolls, ensure that you tape them together with duct tape to prevent movement.
This being said, there are a few differences among the laminate underlay materials to take into account. It’s always best to follow the manufacturer’s instructions, but here are some general elements to keep in mind:
| Material | Extra Considerations |
| Foil | Lay foil side down. Stick tape along the full length of each join once the entire floor is covered. |
| Cork | Cork should fit snugly, and the seams should meet without overlapping. If required, use tape to seal the joints between the cork sheets. |
| Fibreboard | Allow the fibreboard to acclimatise for longer – typically 48 hours. Leave a 10mm gap between the board and the wall, and a gap of approximately 2mm between each board. Stagger the board joints throughout the room so that they are not directly in line with one another. |
| Rubber | If you’re using multiple sheets, make sure to lay them edge to edge without any overlapping. |
| Foam | Place the rows of foam close together whilst ensuring that they don’t overlap. Apply tape along the full length of each join once the subfloor is entirely covered. |
Step 5: Finish and Secure
Once your underlay is in place, it’s time to make any finishing adjustments. We’re talking about final trims, checking for any raised edges or overlaps, and adjusting where required. When you’re happy, it’s time to go forth and lay your laminate flooring!
How to Install Laminate Underlay: Final Reflections
There you have it – how to install laminate underlay like a pro. Choosing the right material and installing it correctly is essential for achieving a high-quality laminate flooring finish. Whether you’re looking for enhanced insulation, better soundproofing, or elevated moisture protection, the right underlay will improve comfort and extend the lifespan of your flooring.
Still unsure? Why not reach out to our friendly team – qualified and experienced, we’re here to help. Alternatively, you can find more flooring advice and how-to guides on our expert flooring blog.