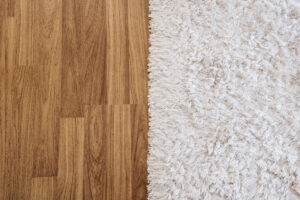
Good floors can last a lifetime, which is why it’s crucial to get their installation right the first time round. In this guide on how to cut laminate flooring, we’ll be putting our 45+ years of experience to good use, walking you through the process of DIY laminate cutting step-by-step.
The key to unlocking any dream interior design always starts with flooring. Your floors are the foundation of your home’s aesthetic, not to mention the first thing your guests will see when they step into a room. So get your goggles on, your tools out the shed, and let’s get started.
Contents:
- What is laminate flooring?
- When to cut laminate
- Tools, measurements & top tips
- How to cut laminate flooring step-by-step
What is laminate flooring? An introduction to the material you’ll be cutting
Laminate flooring is a popular alternative to hardwood floorboards because it’s designed to replicate the authentic look of real wood at a much more affordable price point.
Made from a high-density core of wood fibre, laminate is given its unique appearance thanks to a photoreal image layer embossed and printed on top. Finally, laminate floorboards are sealed by a durable, scratch-resistant and water-resistant wear layer.
Laminate is particularly popular in Yorkshire homes because of how easy it is to install and maintain, throughout its 15-25+ year lifecycle.
Explaining the key difference between laminate flooring and sheet vinyl
It’s worth noting that laminate tends to come in large, rigid boards of varying sizes, and not in rolls of flexible, thin material, like you might have imagined. We don’t know about you, but when we were growing up, we were taught to call the flimsy plasticky stuff that covered school canteen floors ‘laminate’. In fact, that’s what we now call sheet vinyl, an even cheaper alternative to laminate, which can sometimes be cut to size with a Stanley knife or box cutter. In this guide, we’ll be focusing on the much stronger laminate floorboards.
Benefits of laminate floor for DIY installation
- Laminate flooring is one of the most affordable wood flooring alternatives
- Laminate can be cut by hand or with the aid of machine saws fairly easily
- Laminate floors are some of the easiest for laying around obstacles
- Laminate flooring is fairly resistant to water damage, spills and scrapes, making it just as suitable for living rooms as it is for bathroom flooring and homes with pets
- Laminate floorboards are available in an array of different styles and finishes
- Laminate flooring, if installed correctly, has a long lifetime of up to 25+ years
- Laminate flooring is safe to use with underfloor heating up to 27°C
When to cut laminate flooring
Unless you’re really lucky, you’ll almost always have to cut laminate flooring to size before laying it at home. Most rooms aren’t uniform squares or rectangles that a set number of laminate floorboards will fit perfectly.
Instead, rooms tend to have lots of different angles and odd shapes to fit your flooring to—such as at bay windows, by cupboards, around toilets, sinks, fireplaces and appliances, and so on. This is especially true in those older country homes in parts of the country like York.

Before you get started: tools, measurements, and top tips
If you’re now ready to learn how to cut laminate flooring by yourself, you’ll need to complete this quick checklist of things to do and tools to gather before you start the actual sawing. We’ve also got some top tips from the trade to help you cut your laminate as efficiently as possible.
Tools
- Dust mask
- Dust sheets
- Goggles
- Work gloves
- Work bench (or other sturdy surface for cutting on)
- Clamps for securing the laminate boards in place
- Pencil or marker pen
- Rule, ruler or edge (preferably of a sturdy material like metal)
- Tape measure
- Tracing paper
- Saw (you can use either a hand saw, jigsaw, or table saw)
Measurements
It is really important that your measurements are thorough and accurate, not only to help you cut your laminate floorboards to the correct size, but also to ensure you don’t end up spending more than you need to on excess material.
We’ve already put together a really comprehensive guide on how to measure the exact amount of laminate you’ll need for any size or shape of room.
Top tips for laminate cutting
Below are answers to some of the questions and tips we get asked for most often, when it comes to cutting laminate DIY.
Tip 1) How to cut laminate flooring without a saw
Like we mentioned earlier, a common misconception is that laminate flooring comes in a roll of thin, flexible material which you can cut without a saw. But this isn’t the case. Laminate and sheet vinyl are two different materials, and only sheet vinyl is thin enough to be cut with a box cutter or Stanley knife.
Tip 2) Consider buying extra in case you want to refloor other rooms in future
Sometimes a homeware supplier like B&Q will run limited editions of their wood-effect laminate flooring, which is great, but not ideal if you only buy enough to finish one room and then decide to refloor some more further down the line.
If you’re renovating your house one room at a time, then consider stocking up on your chosen laminate floorboards, with an eye to making your flooring uniform throughout the house over time.
Tip 3) Measure once, then measure again!
Honestly, we cannot stress the importance of preparation. As they say, prior preparation prevents poor performance, and that’s especially true when it comes to cutting laminate flooring. Once you’ve cut the stuff, there’s no going back, so save yourself cash and make sure you get your cuts right first time by triple-checking those measurements.
Tip 4) Use the finest tooth saw you can to avoid chipping your laminate floorboards
The finer the teeth of your saw, the easier it will be to cut through your laminate flooring easily, without causing chips to damage to the fibre core. By finer, in this case, we mean a higher TPI, or number of ‘teeth-per-inch’.
Tip 5) If the job’s out of your league, don’t be afraid to call in the professionals
Since laminate’s a relatively affordable type of flooring, it can be tempting to want to keep renovation costs to an absolute minimum by doing the cutting and installation work yourself—DIY.
We love DIY, it’s why we became flooring professionals in the first place, but we’ve also seen plenty of rushed and botched jobs in our time. That’s why our final tip is this: if you’re unsure, don’t risk a bad finish, call in the pros instead!

Laminate flooring: How to cut it step-by-step, a guide for Yorkshire homeowners
Right, onto the meat of the article! Let’s take a look at the five main steps to cutting laminate flooring for your next home renovation project.
Step 1) Safety first
First things first, make sure you’re being DIY safe and sensible. Clear a large and light enough space to work in without bumping into obstacles or being unable to clearly see where you’re cutting. Don your work gloves (something with grip and protective layering is ideal), your goggles and your dust mask. Lastly, put down dust sheets to make the clean up process as easy as possible.
Step 2) Mark the laminate using your measurements
Step two is the most important step of them all: marking the laminate in preparation for cutting. Using the careful and triple-checked measurements you took earlier, you should be able to create a plan of how many laminate boards you’ll be able to install as they come, and where. After which, you’ll need to cut your remaining boards down to size to fit into and around all those leftover corners, nooks, crannies and obstacles. Using your ruler and pencil—or a stencil on tracing paper taken from around obstacles—mark your cutting lines onto the top side of your laminate.
Step 3) Clamp your laminate flooring in place
Now that your laminate board is marked for cutting, you need to clamp it in place atop your workbench (or other hard, sturdy surface). Ideally, you want the laminate board clamped at either side, with the line to be cut along sitting beyond the surface of the workbench with space enough beneath for your saw. If you can’t secure the board with clamps at both sides, make sure at least one side is clamped before cutting.
Note: If using a table saw, you should not clamp the wood as you will push the wood through the blade to cut it (rather than pushing the blade through the wood).
Step 4.1) Cutting laminate with a handsaw
If cutting your laminate with a handsaw, start at a 45° angle to the floorboard and begin gently sawing back and forth along the drawn line, from one end to the other.
Note: A handsaw is most appropriate for small cutting lengths, and in situations where the cutting line on the laminate board is straight.
Step 4.2) Cutting laminate with a table saw
If cutting your laminate with a table saw, bring the edge of the cutting line on the laminate board close to the saw blade and safely start the saw. Carefully push the laminate board through the table saw, ensuring that the saw cuts squarely along the line without deviating. This requires careful, equal pressure from you. You can use your hands to push the board at first, but as your hands approach the blade, we would always recommend switching to plastic ‘push sticks’ to finish off the cut safely.
Note: A table saw is most appropriate for longer cutting lengths, and in situations where the cutting line on the laminate board is straight.
Step 4.3) Cutting laminate with a jigsaw
If cutting your laminate with a jigsaw, we recommend first testing the saw on a spare bit of laminate to determine which teeth direction creates the smooth cut along the finished surface. Once you’ve worked this out, you can start cutting along the cutting line of the clamped board, slowly and carefully, from one side to the other.
Note: A jigsaw is most appropriate for varying cutting lengths in situations where the cutting line on the laminate board is curved or otherwise not straight.
Step 5) Very gently sand the cut edges of your laminate smooth
The last step in our guide on how to cut laminate floorboards is optional, depending on your needs. If you find that some of the cut edges (and exposed wood-fibre core) of your laminate wood flooring is a little ragged from the saw, you can use a very fine sandpaper to very gently smooth those edges down, prior to laying.
Conclusion
Thank you for reading our complete guide to cutting laminate flooring at home by yourself! We hope you’re feeling prepared to tackle the cutting process and everything that comes after, from laying laminate underlay to installing the cut boards in place. For more DIY and design tips on interior floors in Yorkshire and beyond, check out the Derwenthorpe blog.