In a previous study, the National Wood Flooring Association found that wood flooring can increase home value by up to 10%, making it one of the most popular floor coverings. So, it’s no wonder that wood flooring and underfloor heating are a great pair – when done right. In this handy guide, we’ll cover all you need to know, from the best types of wood flooring for underfloor heating to essential installation tips. Whether you’re well on your way to planning a living room flooring renovation or simply exploring your options, we’ll help you to make an informed decision on a stylish (and warm!) floor that’s sure to last in any space.
Warming Up: Understanding Underfloor Heating
Before we get into materials and installation, it’s important to understand what underfloor heating is and how it works.
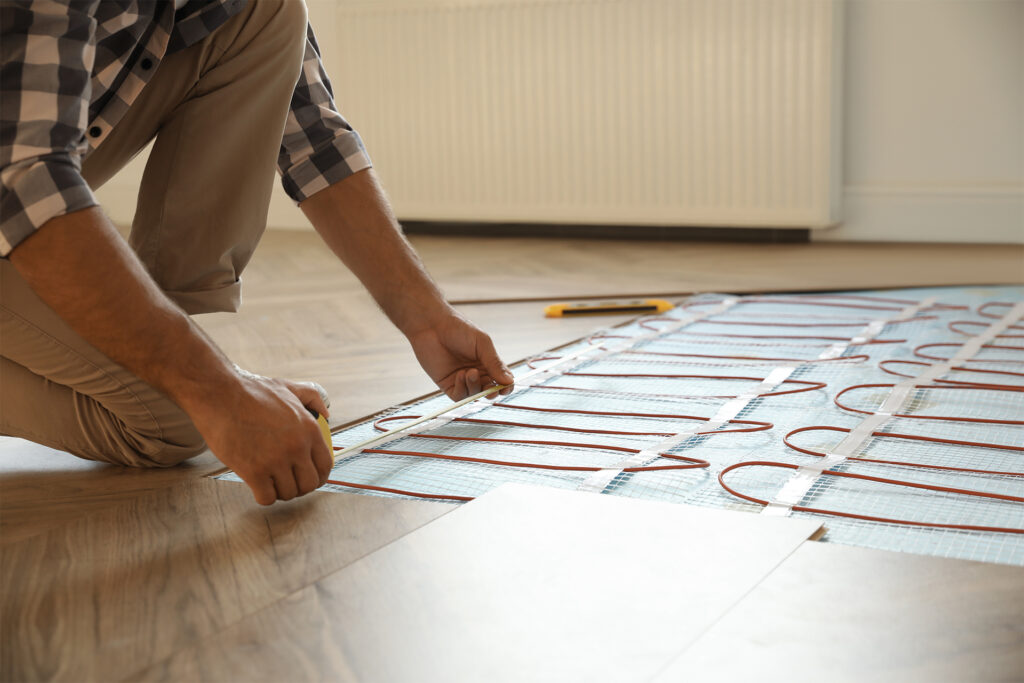
Underfloor heating is a method of warming up a space by installing a heating mechanism beneath the flooring. Generally, there are two types of underfloor heating: wet and dry. Wet underfloor heating entails the installation of pipework below the floor covering. These pipes allow warm water to heat the area as it passes through the mechanism. Dry underfloor heating (also known as electrical underfloor heating) makes use of electric coils to create and circulate heat around the room.
Luckily, both wet and dry underfloor heating mechanisms are compatible with wood flooring. However, when it comes to dry underfloor heating, you’ll want to ensure that you choose an electrical kit specifically designed with wood in mind. The best way to be sure is to check with the supplier or manufacturer before installation if you have any doubts about your specific case.
The Best Types of Wood Flooring for Underfloor Heating
Now that we’ve covered which underfloor heating systems are compatible with wood flooring, it’s time to think about which wood flooring is best for underfloor heating systems. There are two main types of wooden floor: engineered wood and solid wood.
Engineered Wood
The industry favourite for combining wooden floors and underfloor heating, engineered wood provides a strong and durable option to bring together the aesthetic warmth of wood with the real warmth of underfloor heating.
The structural integrity of engineered wood is due to its buildup of several ply layers with a solid wood top. These layers allow heat to pass and rise, increasing the efficiency of the heating system, as well as being less affected by the inevitable fluctuating temperatures that would lead to warping or cracking in a solid wood equivalent.
In addition to engineered wood’s excellent compatibility with underfloor heating, the popularity of the material means that there are plenty of versatile aesthetic options to suit any space. Plus, it tends to cost less than solid wood whilst maintaining the look and feel underfoot: a win-win really.
As with any wooden flooring though, there are a couple of cautions to bear in mind. The recommended board width is no more than 18mm to efficiently allow heat to pass through and warm the room. Also, any wood flooring is generally unsuitable for temperatures above 27˚C since beyond this point, the wood is likely to dry out, causing potential warping or cracking damage.
Solid Wood
Having read the previous section, you may be wondering if you can have solid wood flooring and underfloor heating at all. The answer is yes – but only if certain conditions are met.
Because solid timber has an increased tendency to significantly expand and contract, it is generally not recommended for use with underfloor heating systems. That being said, some wood species are less prone to warping and kiln-dried solid timber can help to combat the moisture level in the wood, aiding the boards to retain their shape. So, if your project really demands the use of solid wood, ensure that you choose a kiln-dried option with a moisture content of around 6-9%, aiming for a less fragile species like oak or walnut.
Further, whilst acclimatisation is an important step for combining any wooden flooring and underfloor heating, special attention must be paid to this step for solid wood. Taking over twice as long as engineered wood, it can require up to seven days of acclimatisation time before installation.
An alternative: Laminate or LVT
An alternative way to achieve the wooden look with a relatively easy installation and maintenance process is to opt for laminate or LVT flooring in wood patterns.
Laminate works similarly to engineered wood whereby layers of HDF (high density fibreboard) are topped with a layer imitating wood. Generally more hardy and less sensitive than wood, laminate is both a cost- and time-efficient choice if you’re looking to achieve the look of wood flooring together with underfloor heating.
Another option to consider is LVT (luxury vinyl tile). Famed for its effective heat distribution and energy-saving benefits, its aesthetic versatility means that an authentic wooden look is easy to find. Compared to laminate, LVT may be slightly more expensive, but it also tends to be more durable. The choice is yours!
Installation of Wood Flooring and Underfloor Heating
Now that you’ve chosen the right wood flooring for your project, it’s time to get cracking with the installation. Laying wood flooring over underfloor heating requires careful planning to be done correctly and so, whilst it is certainly a do-able DIY project, it may be worth it to enquire with a professional.
Nonetheless, if you have decided to do it yourself, or even just for curiosity’s sake, here’s the basic steps to install wood flooring and underfloor heating…
Acclimatisation
The most important step of the whole installation process is undoubtedly to adequately acclimatise your chosen wood. Otherwise, you could face significant expansion and contraction (and, in turn, significant cracking and warping) that effectively will undo all your hard work.
If you’re working with engineered wood, you should aim to let the flooring acclimatise to the space for the time recommended by the manufacturer. This tends to be around 48-72 hours but can be longer or shorter depending on the requirements of the specific material.
As mentioned previously, solid wood will need to acclimatise for significantly longer: up to 7 days depending on the chosen species. As well as the time required, you should aim to make sure that the moisture level in the space is stable before laying out the timber to acclimatise. If the air is too humid, the more likely the planks are to swell and crack. If the air is too dry, then the more likely the planks are to shrink and, well, crack.
The Installation Process
Once you’ve acclimatised the wood, the general process for installing wood flooring and underfloor heating is as follows:
- Prepare the subfloor by cleaning and applying a moisture barrier if necessary.
- Install insulation over the subfloor.
- Lay the underfloor heating system by following manufacturers instructions, ensuring even spacing and tight connections.
- Add a levelling compound, such as a thin layer of screed, to create a smooth surface for the chosen wood floor covering.
- Lay the wood floor covering over the underfloor heating system.
Once you reach the stage of laying the wooden flooring on top of the underfloor heating system, there are three methods you should consider: floating, adhesive, and battening.
Floating
Floating refers to laying the wooden floorboards over the sub-floor without any fixing. The fact that it saves time and energy whilst also ensuring that the flooring is more resistant to fluctuations in humidity and temperature likely explains why this is the most commonly used method.
Adhesive
The adhesive method refers to bonding the wooden flooring to the underfloor heating system. As a result, a strong and secure seal is created between the flooring and the concrete underneath. However, the key to this method is the right product, so it is important to check with your supplier for compatible adhesives and primers for your chosen flooring.
Battening
Battening involves placing and fixing timber battens before the screeding step. Once the screed or concrete is fully dry, you can then attach the flooring to the battens with a relevant fixing, taking care to avoid damaging the floor heating pipes when nailing or screwing.
What About Floorboards and Underfloor Heating?
If you’re wondering about suspended timber floorboards, like those typically found in older buildings, the good news is that they are compatible with underfloor heating! However, as is to be expected, the installation process can quickly become a lot more complicated.
When it comes to wet underfloor heating, the floorboards will typically need to be lifted so that the all-important pipework can be laid before the boards are fixed back down and the area made airtight. Some specialist underfloor heating systems have been designed to fit between the joists of suspended timber flooring which can make it easier (but still a tight fit!)
For dry underfloor heating, the original floorboards will typically serve the purpose of the subfloor. The electrical mechanism will then be placed on top, often with a base of plywood. Then, your new wooden flooring will be installed over the top, resulting in a slightly raised floor than before.
Turning on Your Underfloor Heating
When the installation process is finished, you can get to enjoying your new underfloor heating. Whilst it may be tempting to bump the degrees all the way up, gently and gradually increase the heat so as to avoid shocking the wood with such a drastic temperature change. Turning it up by 5˚C increments daily is your best bet.
Final Reflections
Wood flooring and underfloor heating can add a touch of warmth, style, and comfort to your home – if properly considered and correctly installed. By choosing the right materials and following best practices, you can enjoy the benefits without compromising on durability or efficiency. So, take your time, research your options, and consult professionals where needed.
If you’re looking for more flooring advice and inspiration, why not take a tea break and check out our other blog posts? We’ll see you there!