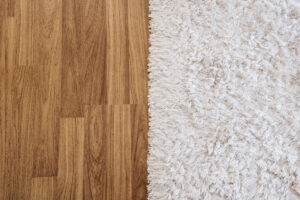
Having surpassed the market share of solid wood, the engineered variety is surging in popularity. And it’s not hard to imagine why: from its sophisticated looks, versatility in the home and unparalleled endurance, it’s bang for your buck. From an installation perspective, it’s also a delight to work with, and one of my favourite jobs to take on as a local installer.
While I would typically signpost newbies towards the professional fitting route, I’m not here to gatekeep the information. DIY, after all, is for everyone.
So, if you’re at the threshold of deciding whether going it alone is for you, you’ll be glad to know that the process isn’t as daunting as you might expect. In this guide, I’ll be sharing how, with a steady hand, keen eye, the right materials and buckets of patience, you too can do a stellar job.
Contents:
- Prior Considerations
- What You’ll Need
- Tutorial: How to Fit Engineered Wood Flooring Step-By-Step
- Common Mistakes To Avoid
- Conclusion
- FAQs

Prior Considerations
Before we get into the meat of this tutorial, there are a handful of things you need to determine first; namely, the condition of your subfloor, which designs, brands and laying patterns you’re partial to, and what installation type to vie for. Your answers will set the trajectory of the project.
Subfloor Condition
The first step in the process is to ensure your subfloors are in good enough condition to handle the installation in the first place. By this, I mean that they need to tick the following boxes…
- Clean: No dirt, debris and dust that can accumulate under the flooring
- Dry: Whether a concrete or wood subfloor, it ought to be bone dry and free of any signs of mould
- Level: No cracks, dints, unevenness or general irregularities.
Spot any of these, and you should act swiftly to remedy the problem. If you’re levelling a wooden subfloor, it’s usually a matter of installing a layer of plywood over the boards, but for issues with concrete, I’d always get an expert in due to the complexity of the task.
Aesthetics & Design
I won’t dwell too long here, as I’ve already put together a dedicated guide to wood floor designs, but here are a few tips that we, the Derwenthorpe crew, have picked up from fitting engineered wood floors across Yorkshire:
- A detailed grain pattern goes a long way to add texture and interest to any interior, whether in a new build or period property.
- Wider planks bring a more luxurious, elevated country feel.
- Long, narrower planks, in contrast, are a great choice for visually elongating living spaces.
- Lighter wood tones bring an airy feel, mid-tones are toasty and grounded, and dark woods with – for example, a rich mahogany or black elm – create a mature, moody ambience.
- Busier patterns can anchor larger rooms but can be overstimulating in spaces with plenty of doorways, breaks or alcoves, whilst minimalist planks help make interiors look bigger.
Laying Pattern
Of course, the laying pattern has a bearing on aesthetics, but more so, it impacts your DIY experience. Whether a Versailles-inspired herringbone or classic chevron, complex designs demand an extended skillset to tackle the extra measuring and cutting involved. They also require additional material to account for the greater number of cut-offs at the edges of the room.
As such, in my professional opinion, the only people tackling these designs should be those with enough experience and expertise not to waste precious material. The downside is that these types of installations tend to be a bit more expensive, so if you’re really stuck on a decorative laying pattern, it’s worth comparing a similar LVT to your favourite engineered wood options.
Installation Method
There are two key methods you can use to get your engineered wood floor in place, and both are relatively straightforward:
- ‘Floating’ the floor over your underlay
- Glueing the planks straight down onto the subfloor
- Nailing the flooring to the subfloor with nails or staples
Floating essentially refers to an installation method whereby the installer fits the flooring without any adhesive or nails, instead using the in-built locking system on the boards to slot them neatly together. It’s the easiest, quickest and most cost-effective method of the trio and best for concrete subfloors.
The glue-down approach is self-explanatory: it involves bonding the planks directly to the concrete subfloor with an adhesive, usually to achieve superior, more permanent stability. Nail-down installations, in contrast, are reserved for wooden subfloors and work best with tongue-and-groove planks.
Always check the manufacturer’s specs and installation instructions before purchasing your flooring, as this will determine which method you’ll need to follow. In my experience, the method ought to come before the design, so you know what you’re getting yourself into.
Brand
One final thing to look out for is a reputable, high-quality brand. After all, they say “buy cheap, buy twice” for a reason.
At Derwenthorpe, we work with Timba Floors and Brooks products, which are specially designed to mimic the organic natural finish of real wood, with added water resistance and durability that means they last for yonks. If you own pets or are planning to put your new floor in a high-traffic area like a kitchen or corridor,
Nonetheless, there’s a wealth of both affordable and visually stunning solid wood alternatives on the market, so make sure to take your time to find your perfect flooring – I promise you, it’s worth it.

What You’ll Need
With the preliminaries covered, it’s about time we move on to your equipment list. For fitting your shiny new engineered wood flooring, you’ll have to get your hands on…
- A high-quality brand of engineered wood within your budget
- Compatible underlay and underlayment tape (for floating installations)
- A spirit level to check the subfloor’s evenness
- A tape measure, pencil and ruler (or laser measure, if you’re feeling fancy)
- A circular or jigsaw
- Spacers for the expansion gaps
- A rubber mallet and/or tapping block
- An appropriate flooring adhesive and notched trowel (optionals for the glue-down method)
How to Fit Engineered Wood Flooring Step-By-Step (Specialist-Approved)
- Difficulty: Moderate.
- Time Needed: 3-5 days, including acclimatisation, or 8-16 hours for beginners.
- Flooring cost per m2: £35 on average.
1) Ensure the Subfloor is in Tip-Top Condition
Before you do anything at all, you absolutely have to assess the condition of your subfloor for the golden trio: level, clean and dry.
So, rip up the old flooring and inspect what’s underneath. If you see signs of damp and mould, this is where you should get an expert opinion, as you might not immediately be able to tell if the problem is structural. Alternatively, if you can get your hands on a moisture detector, you can check your readings against
With regards to unevenness, for wooden subfloors, the typical fix would be to install a layer of level plywood over the top. And for concrete, you’d need to use a heavy-duty grinder to get any high spots smoothed out, before applying a latex-based self-levelling compound for a smooth finish. Once the compound is set (usually after 4-6 hours), you can then move on to the actual engineered wood floor laying.
Sounds like a lot of hassle? Then it might be best to call the experts – this way, you’ll have the peace of mind that the foundations of your engineered wood project are sound. With uneven, old or even damp subfloors, a professional touch can make all the difference.
2) Measure the Room to Size
To make sure you order the right amount of material, measure the room as accurately as you can.
Take the maximum width and length – not forgetting to include obstacles like fitted kitchen units, alcoves and doorways – and multiply them to get the base square meterage. With complicated rooms, I like to break them into smaller shapes for ease and just total them up at the end.
Always add 5-10% excess to account for waste or mistakes, and increase it to 10-20% for complex patterns with more cutoffs (remember what I said about herringbone?).
3) Allow Your Flooring to Acclimatise
As with any type of hard flooring, from LVT to solid wood, you must acclimatise the planks to the environment’s temperature fluctuations and humidity levels. The absolute minimum you can leave it is for 2 days, but I recommend 5-7 for a quality finish.
FYI: By acclimatisation, I’m referring to the process of leaving your flooring stacked up in the same room you intend to install it to allow it to adjust to the new environment. This helps prevent any moving, warping or expansion after you get the boards fitted.
With underfloor heating systems, you also have to account for humidity; the moisture in the interior really ought to be stable before you move the flooring into the room.

4) Get Your Underlay in Position
Note: If you’re glueing the planks onto a concrete subfloor or following the nail-down route with a wood subfloor, you can skip ahead to step 5.
Next up, you need to get your engineered wood underlay into position; that is, if you’re opting for a floating installation.
This, first, requires placing down a damp-proof membrane to protect against moisture: ensure it reaches slightly up the wall to protect the board edges – this is crucial for high-performing results.
Then, as you would fit carpet underlay, place the underlay roll at one end of the room and unroll it from the wall, leaving a 10mm gap around pipes. Listen: it’s important to make sure that the edges meet without overlapping (doing so results in an uneven floor), so take extra care with the placement. Trim the opposite end using a utility knife and seal the joins with underlayment tape.
5) Begin Laying Your Engineered Wood Flooring
Floating Installation
Beginning in the corner of the room, place the first plank down with the click-lock system facing the wall, allowing for a small expansion gap (8-15mm) with your spacers. Then you can connect the next plank at an angle, inserting it into the specially designed slotting edge. Once in place, grab your mallet and give it a good tap to bring them together so that they’re fully engaged.
Continue the installation in this manner, row by row, staggering the joints between rows for maximum visual appeal. When you get to the end, trim the final row of planks as needed to fit the space. At this stage, you can then remove any spacers used to create expansion gaps and install any baseboards or moulding to conceal those around the perimeter.
Glue-Down Installation
If you decide to use adhesive to secure the planks, carefully follow the instructions provided by the manufacturer, but whatever your choice of adhesive, be sure to work methodically to achieve a smooth finish.
Using a notched trowel, scoop up an appropriate amount of adhesive and spread it evenly over a small section of the subfloor. The size of the section depends on the drying time of the adhesive, but typically it’s best to work in areas that you can cover with planks within 15-20 minutes.
Hold the trowel at a 45-degree angle to the subfloor and spread the adhesive in the direction that will create grooves or ridges. These ridges help ensure proper coverage and bonding between the subfloor and the flooring planks.
Once the adhesive is applied, carefully lay each tongue and groove plank into the adhesive, pressing down firmly. Like the previous method, you should begin by laying out the first row of planks along the starting wall with the tongue side facing the wall and place spacers between the planks and the wall to maintain an expansion gap. Give the boards a gentle tap with your rubber mallet to get them to slot together snugly.
If you notice any looseness, you can go to the additional length of securing these boards with nails, but this is an extra optional step.
Top tip: I recommend that herringbone or parquet be installed via this method to ensure maximum stability as well as the pattern’s integrity.
Glue-Down Installation
In the instance of a timber subfloor, you might wish to nail down the engineered wood for ultimate staying power. Here, the methodology isn’t too different from the glue-down approach.
Using a pneumatic floor stapler/nailer at a 45-degree angle, secure each board together with the staples or cleats through the tongue side of the plank. Here, the first row is critical as it will set the precision and straightness of the following lines – make sure to leave the tongue facing away from the wall to allow enough room for the nailer to do its job. Again, leave an 8-15mm expansion gap around the perimeter of the interior.
Top tip: Always follow the specific manufacturer’s instructions, as some thinner engineered floors may not be suitable for nailing.
6) Allow the Engineered Wood to Settle
Now comes the question, “How soon can I walk on my new floor?” And it’s an important one.
It’s safe to walk (cautiously) on a new engineered wood floor 48 hours after the installation, for both glued and floated floors. In terms of getting the room back into full working order with furniture, you might want to wait a few more days to help it settle.
As a general rule, I recommend always following the manufacturer’s instructions to allow for the optimal period of acclimitisation.
And… You’re Done!
*Cue the music and applause*
Nice work, friends! Now, you should have a beautifully fitted engineered wood floor to the envy of all your visitors. All that’s left is to put your feet up, uncork a bottle or two, or perhaps take a photo to pop on social media. After all, your floor deserves a moment in the spotlight.
Common Mistakes I’ve Seen on the Job (& How to Avoid Them)
As this reel aptly puts it, the funny thing about buying a house is that you slowly start to dislike the previous owners for very specific reasons – some feel small (dare I say petty), others like the floorboards above, are much more justified.
Personally, I’ve seen plenty of ‘landlord specials’ and DIYs gone wrong in my time, and it’s not uncommon that the Derwenthorpe team have been called out to fix these mistakes.
To make sure you’re not following in these footsteps, here are some of the most common ones:
- Picking a sub-par brand: If the price tag is too good to be true, you might be getting what you pay for – a low-quality product with a limited lifespan. Often, the more cost-effective choice is to pick something at a higher price point, albeit with thicker wear layers and moisture resistance.
- Skipping over the acclimatisation: From a layperson’s POV, leaving your floorboards lying around in the room for a few days sounds like a waste of time, but it’s actually one of the foundational elements of a job done well. Failing to acclimatise them correctly means risking unwanted expansion and contraction after installation, wasting all the time and energy you poured into the project.
- Skimping on the subfloor preparation: As they say, failing to prepare is failing to prepare; and nowhere is this more the case than with your subfloor prep. Before you lay down a single plank, the subfloor must be clean, dry, level and free of debris – otherwise your floor’s stability is compromised.
- Neglecting moisture protection: Failing to account for moisture can lead to a host of failures in your flooring, but especially warping and rot. Case in point, this sticking plaster solution we encountered in a local clinic – yep, the previous installer chose to put ply over damp concrete!
- Ordering the wrong amount of material: If there’s a case for double, even triple, checking your room measurements, it’s this. Always ensure you’ve got an accurate picture of the dimensions, and don’t forget to account for obstacles and/or the golden rule of 10% excess.
- Cutting corners with expansion gaps and placement: Precision pays when you’re laying engineered wood flooring; it’s the difference between sliding boards and a neat, snug fit. Always heed expansion gaps and keep your planks as straight and aligned as possible. Here, a rule or a laser measure is your best friend.
- Treating your floors poorly post-installation: Of course, this applies mid-process – you don’t want to go and drop a heavy tool on a plank you just slotted into place – but treating your engineered flooring well after you’ve laid it extends its lifespan exponentially. This means avoiding heavy impact to the floor and protecting it from scratches, for instance, by using floor protectors under chair and table legs.
Conclusion: If in Doubt, a Professional Instal is a Life-Long Investment
Whoa, that was an info dump and a half! Congratulations on getting to the end of my guide. I hope that it was as comforting as it was informative, and that you now feel confident enough to get the ball rolling with your project.
Not so certain? Then it’s probably best left to the experts – with decades of experience, heaps of muscle memory, quality materials and the skills at their fingertips, they’ll guarantee you an immaculate job that stays immaculate for the long run.
Like the sound of that? Then, give our flooring specialists a call. We’ll sort you out, whatever your situation.
Engineered Wood Flooring Frequently Asked Questions
Before I wrap up this article, here are a few frequently asked questions to help you on your journey towards fitting your own engineered wood flooring. I hope they clear up any lingering hesitation!